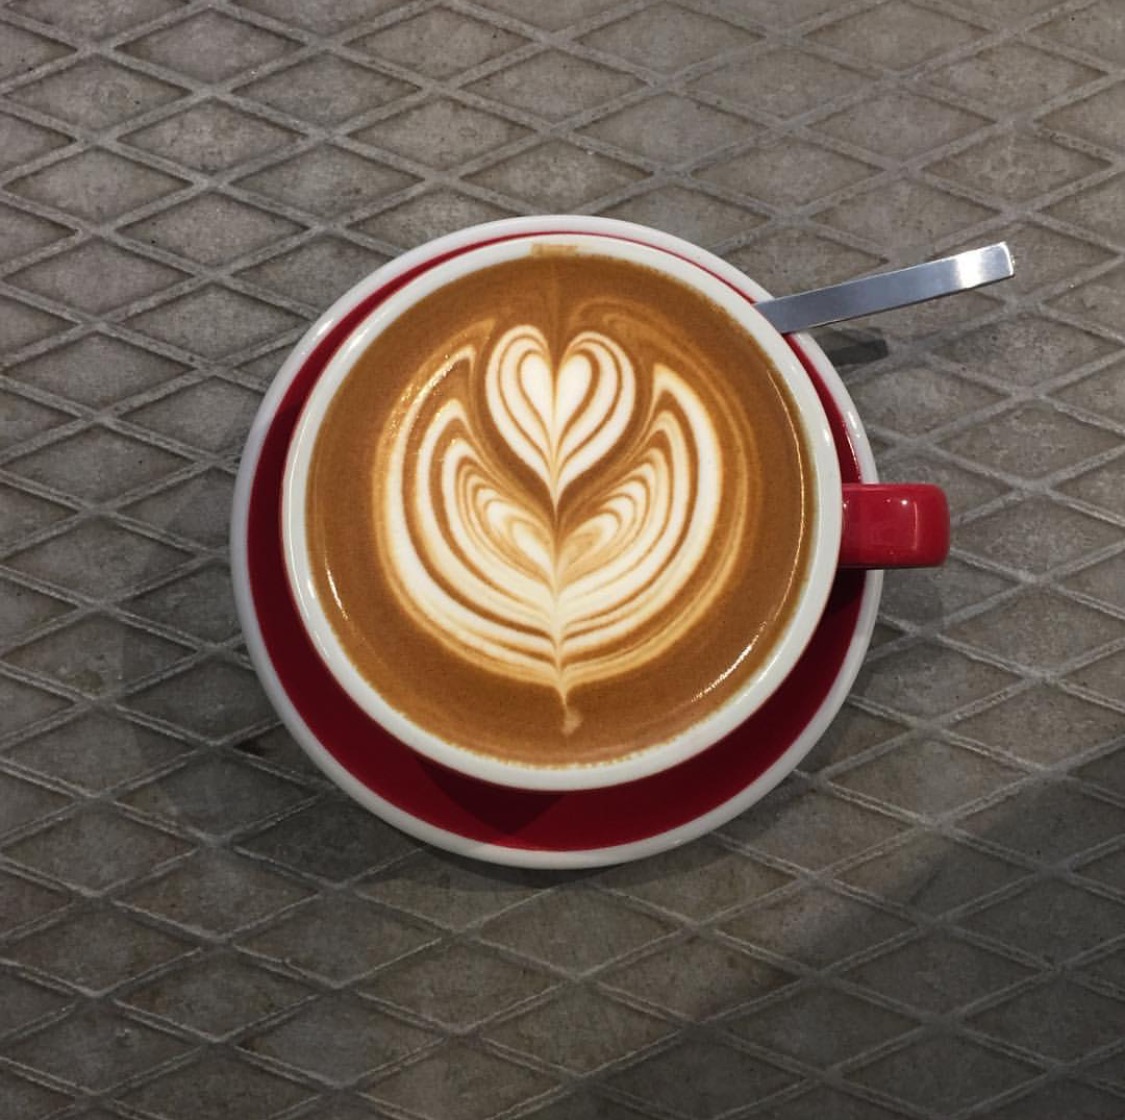
While many agree that making a good cup of espresso is an art within itself, latte art refers to patterns made in the foam topping espresso drinks. If you want to get in touch with your inner barista (expert in coffee preparation), latte art is a critical skill, which can take years to master.
Pour enough cold milk (34ºF or 1ºC) for one cup into the steam pitcher.
Place your pitcher in the refrigerator or freezer before using if you have the time. A cold pitcher will give you more time steaming your milk, decreasing your chances of scalding it. It also makes the cream more stiff and easy to handle. Try to refrigerate it for at least 30 minutes before use.
* For the perfect foam, always have a liquid thermometer handy. A thermometer will help you be exact about removing the milk from the steamer before it scalds. The goal is to heat the cream to just below boiling. Don’t keep it at this temperature for too long, though as it can scald anyway.
2
Put the steam wand at the bottom of the pitcher. Turn on the steam, and slowly raise the wand until it is near the top of the milk. Lower the pitcher as the milk rises so the steam wand stays 1 centimeter (0.4 in) away from the top of the milk. The milk should not stretch too much nor should there be any big bubbles. This should create a smooth, velvety milk as opposed to the foam that sits atop most espresso drinks.
Allow the milk to reach 100º F (37º C).
Then place the steam wand on the side of the pitcher, deep into the milk, positioning the pitcher to spin counterclockwise.
* “Turbulate” or spin the milk gently counter-clockwise with the steam wand still positioned near the bottom of the pitcher.
Keep doing this motion until the milk heats to between 150º F and 155º F (65º C to 68º C).
The absolute hottest you should get with your foamed milk is 160º F (71º C).
* Keep in mind: Some commercial steamers heat up the milk so quickly that you’ll need to remove the milk from the steamer about 10º F before it’s at its limit in order to keep it from scalding. This is because the milk continues to heat up even when it isn’t being steamed.
* Shoot for small, light bubbles (called microfoam) instead of big, dishwater-like bubbles. You want your foam to have lightness without sacrificing body.
Shut the steam and remove the steam wand and thermometer from the milk.
Clean the steam wand with a wet cloth.
Let the milk settle for a few seconds.This will allow a more velvety texture.
Swirl the milk vigorously. If you see any bubbles, pound the pitcher on the counter several times and go back to swirling the milk for 20 to 30 seconds.
Part Two of Three:
Pulling Your Espresso
Use between 7-8 grams of ground espresso for each shot of espresso.
Start running your shots immediately after you have foamed your milk.
* Tamp down using between 30-40 lbs of pressure on your portafilter. Press down on a bathroom scale to figure out how hard you’ll have to press on the portafilter. For most adults, this is about as strong as you can press down with one hand.
* Use a burr grinder for extra freshness. Burr grinders will let you control how fine or coarse your espresso grinds turn out.
Pull your espresso shots. The perfect shot has a little bit of cream in it, and delivers the quintessential coffee flavor.
* A perfect shot is pulled inside of 21-24 seconds, with the espresso being sweeter when the shots are running closer to 24 seconds.
* You can control the length of the extraction by how hard you tamp down on the espresso grounds. Tamp just hard enough and your espresso will extract slowly and calmly. Don’t tamp enough and your espresso will extract too quickly.
Pour your shot(s) into your coffee mug or equivalent container. Don’t let your shots sit for longer than 10 seconds without adding milk to them. If desired, place 1 shot of flavor in cup before adding espresso.
Try creating a flower pattern. This flower pattern is simple, elegant, and relatively easy. As with all latte art, it might take a while to master.
* Pour the milk about an inch (2 cm – 3 cm) away from the bottom.
* Once the cup is about half filled, gently shake the pitcher back and forth while slowly moving it backwards. The flower design will move forward, filling the cup.
* Do this with a shaking motion originating at the wrist instead of moving your hand back and forth.
Try creating a heart pattern. This pattern is also relatively easy, but should be practiced in order to master.
* Starting off with the milk pitcher close to the top of the mug, introduce a little bit of milk in the same place.
* Lifting the pitcher an inch or so up, pour one revolution of a circle, making sure to move the milk pitcher, not the mug.
* Hold the stream of milk in the same place, but wiggle the milk pitcher back and forth as you make a ringed circle.
* When your milk is almost completely poured, swing the milk up to create the bottom tip of your heart.
Embellish the design using stencils, powder, and milk foam. This step is optional, as many prefer to limit their latte art to “free form” methods, but you may want to experiment with the possibilities added by “etching.”
* To write a word, such as “love” in the picture, melt milk chocolate and using a pin as a paintbrush drag the melting chocolate over the foamed milk. More commonly this is done by dipping said pointy object into the cream of the drink being decorated, and then transferring that cream stained foam to the pure white foam to ‘draw’ a design.
* Embellish with chocolate in other ways, too. Pour chocolate syrup on top of foam and then start decorating with a pin. Make an outline the edges of your foam pattern with chocolate. Taking a pin, cut small circles out of the chocolate, using one continuous motion. This will create chocolate waves.
By wikihow


