Stylish DIY hangers
According to my mom, my niece Delilah {who’s 4-1/2 years old now} is obsessed with putting on mini fashion shows after school, with her friend Bella… and while they alternate princess dresses “backstage” to walk down the “runway” and pose in, they sip apple juice just like the “real models” {which I can only assume is champagne}.
But since Delilah has been able to walk {or somewhere after}, she’s also been obsessed with wearing princess dresses, which I’m sure, if you have a daughter, you understand. In fact, the last time she visited, she arrived in a bright pink Minnie Mouse costume and changed into a Repunzel costume when it was time to go out. Her outfit in the Glitter Toe Cap Shoes DIY we did together a few years ago is further evidence of said obsession.
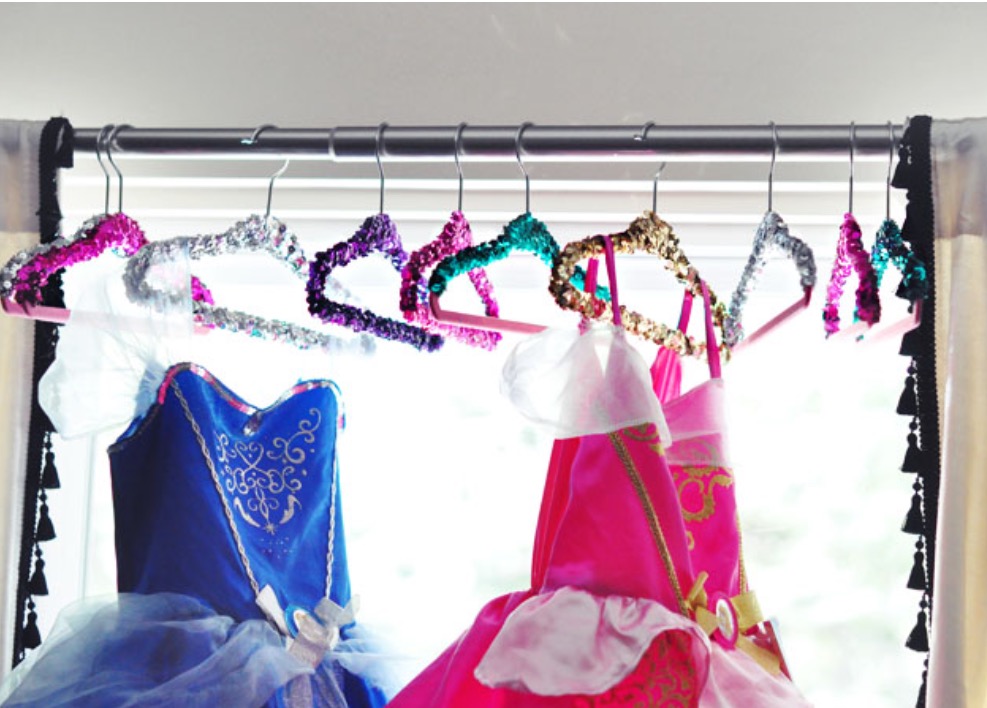
After making my DIY Sequin Display Hanger for myself a few weeks ago, I thought it would be adorable to make a set for Delilah to hang all her pretty princess dresses on, because you know, princesses need princess hangers. And also, this is a great DIY gift or for any little princess who loves dressing up and all things sparkly.
Here’s what you need
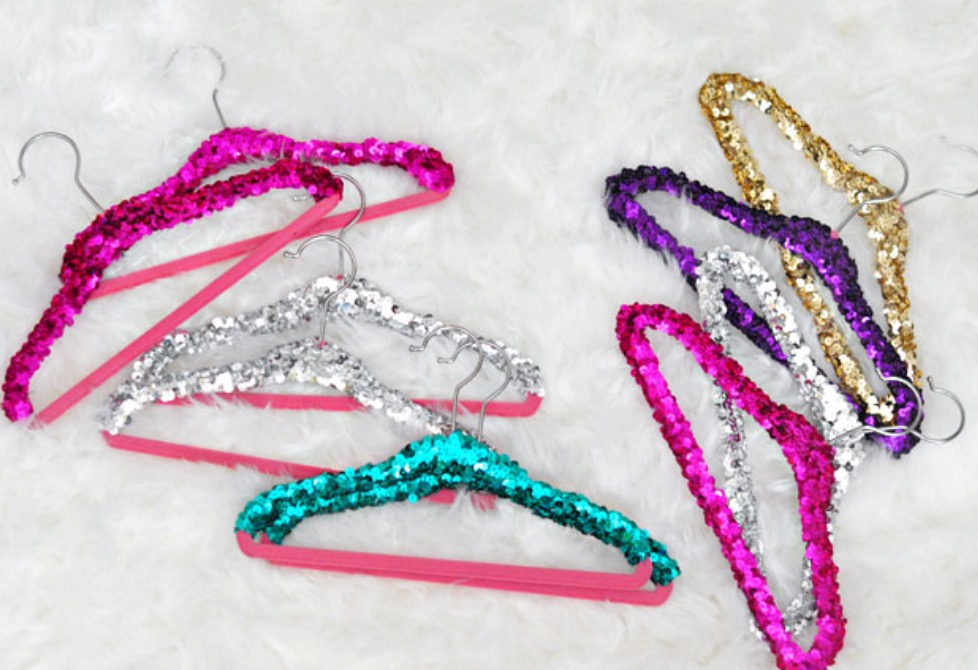
Children’s velvet lined hangers {in pink, of course}
* Stretch sequin trim in all the princess-y colors {at least 1-1/4″ wide}
* Needle/Matching thread {or close enough
NOTE: You may try to hot glue it… I didn’t find it necessary, but it’s another option.
FIRST: If the width of your sequin trim is 1-1/2″ or larger, you can use THIS SEQUIN HANGER DIY as an alternative option.
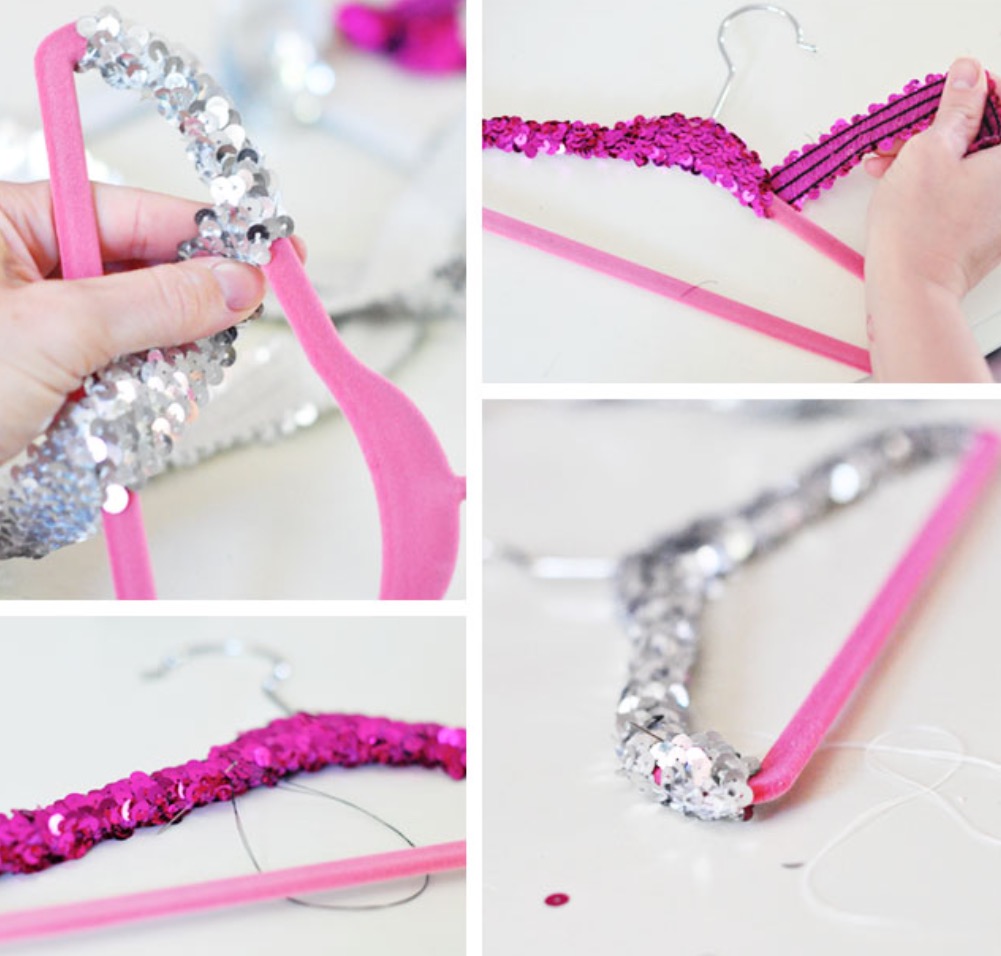
Because my sequin trim was 1-1/4″ wide, I found this technique {in this post} to be the best option because it was a little too short to do it the other way… I bought one yard of the purple, teal, & gold and two yards of the pink and silver. I found that one yard either covered one entire hanger – top and bottom OR two “tops” of hangers as you see below. 2 yards created one full hanger AND two hanger tops.
I covered ten hangers total, 4 completely and 6 tops.
1. Begin at the edge/corner of your hanger, and with the edge of your trim, begin wrapping the trim around your hanger on an angle, stretching as you go so that it’s tight enough to hold itself together, but not too tightly that you can see the pink hanger through the trim. Make sure you overlap the first section so it stays put.
2. If you have enough trim, continue around the entire hanger this way.
3. At the other end of your trim, repeat the first step by tucking it underneath the wrapped sections.
4. With a need and thread, simply run a stitch through the under side sections just to make sure it stays in place. If you’ve wrapped it right, it the stretch and texture will keep it in place while you stitch. The stitches are just for good measure to keep it together.
And Voila!
By love Maegan
The most adorable DIY hangers

DIY sequin glam hangers
Fit for a princess
The process