So it’s another much needed rest day guys.
After that double boot camp session your muscles really need some time to recover.
We thought we’d reward you for your dedication and perseverance with these “oh so scrumptious recipes” some healthy and some naughty but you gotta do naughty sometimes, because being good all the time can be so boring right!!!! Hehehe.
Let us know if you try any.
Banana Bread in a Mug
1 egg 1 Tablespoon buttermilk ¼ teaspoon vanilla extract 1 Tablespoon melted coconut oil or other oil 3 Tablespoons flour 3 Tablespoons brown sugar ⅛ teaspoon baking powder 1/8 teaspoon salt ¼ teaspoon ground cinnamon (optional) OPTIONAL TOPPINGS Whipped cream 1 Tablespoon toasted and chopped pecans Banana slices Powdered sugar Directions In a large, microwave-safe coffee mug, mash your ripe banana. Add the egg, buttermilk, vanilla extract, oil, flour, brown sugar, baking powder, salt, and cinnamon (if using). Mix to combine. “Bake” it in the microwave for 2 to 3 minutes. (You can stop and check for doneness at the 90-second or 2-minute mark.) The banana bread will be very hot, so allow it to cool for a few minutes before eating it. Top with whipped cream, pecans, and sliced banana, if desired.
No bake lady finger roll cake
Yum!!! This no-bake lady finger roll cake is the perfect summertime dessert. With a ladyfinger cookie crust, creamy vanilla pudding filling and a banana center, it's like a tiramisu with a flavor all its own. Enjoy! Recipe Today, you can buy ladyfingers in the bakery section of big grocery stores like Walmart, and markets that specialize in European ingredients. Fun fact: ladyfingers are often given to teething babies. Don’t worry about messing up the rolling step — we’ll show you a foolproof way to shape a cake roll using a handy plastic wrap trick, and you’ll be on a roll in no time. Since this cake needs to spend some time chilling out in the fridge before serving, it’s a great make-ahead treat to take to a party. Just wait until your guests take their first custardy bite and discover what’s inside. Makes 8 servings Prep Time: 15 minutes Total Time: 4 hours 15 minutes Ingredients * 24 ladyfinger cookies * 1½ cups milk for soaking ladyfingers * 2 cups vanilla pudding (one 5.1 oz package of instant pudding mixed with 1¾ cups milk) or pastry cream * 2 bananas, peeled * 1 Tablespoon cocoa powder or instant espresso powder * 1 cup whipped cream Directions 1. Pour the milk into a wide, shallow dish. Dip each ladyfinger into the milk to soften them so that they will roll without breaking. (The ladyfingers should be thoroughly soaked, so not to the point of falling apart or becoming soggy.) 2. Lay a long piece of plastic wrap out on the counter. (It should be large enough to fit two rows of 12 ladyfingers, with a couple of extra inches of plastic wrap on each side.) Place two rows of ladyfingers, side by side, on the plastic wrap . Cover the ladyfingers with a second piece of plastic wrap, and place them in the refrigerator for 4 hours or overnight. 3. While they are chilling, prepare the whipped cream and the vanilla pudding or pastry cream. 4. After 4 hours, remove the soaked and chilled ladyfingers from the refrigerator. Check to see if the ladyfingers have softened enough to become rollable. If some of the ladyfingers are still slightly crunchy, use a pastry brush to add a little extra milk to the ladyfingers and return the them to the fridge for an additional hour. 5. Once the ladyfingers are pliable, take the top layer of plastic wrap off. Spread the pudding or pastry cream in a thin, even layer over the surface of the ladyfingers, leaving a ½-inch border along one of the long sides. 6. Place the bananas, lengthwise, in the middle of the row of ladyfingers that is completely covered with pudding or pastry cream (the long side without the ½-inch border). You may have to cut one of the bananas so that it fits. 7. Carefully lifting the bottom piece of plastic wrap on the side with the bananas, roll the ladyfingers up and over the bananas and continue rolling the entire cake to form a cylinder with the ends of the two rows of ladyfingers coming together. 8. Refrigerate the roll cake, covered in plastic wrap, for at least 30 minutes, or up to 3 hours, to help the cake hold its shape. 9. Dust a serving tray with cocoa powder or instant espresso powder. Remove the plastic wrap from the roll cak eand place the roll cake on the tray. 10. Fill a pastry piping bag with whipped cream, or put the whipped cream into a plastic baggy and cut a small hole in one of the bottom corners to make your own pastry bag. Pipe the whipped cream on top of the roll cake to cover the seam between the two rows of ladyfingers. 11. Dust the top of the roll cake with more cocoa powder or instant espresso powder, and cut the cake roll into slices. (It’s easiest if you cut between the ladyfingers). Serve chilled.
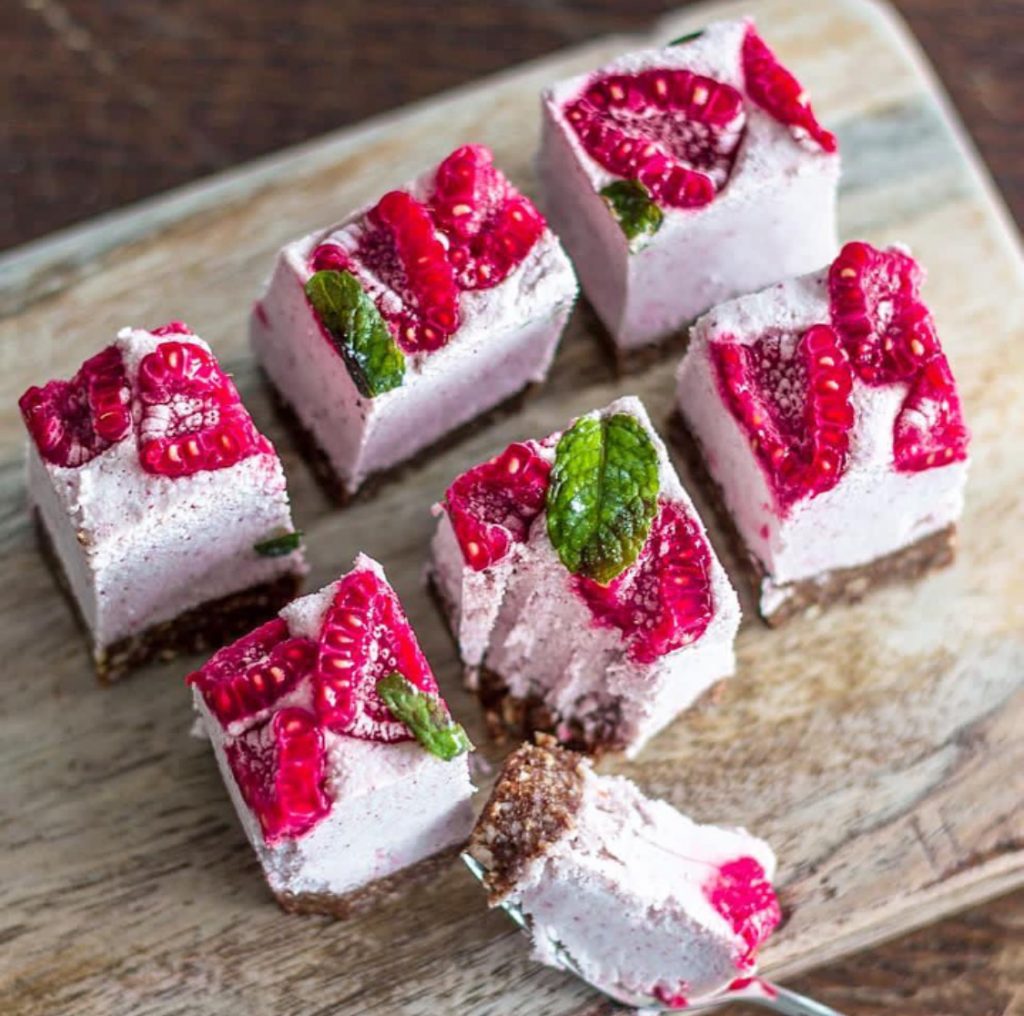
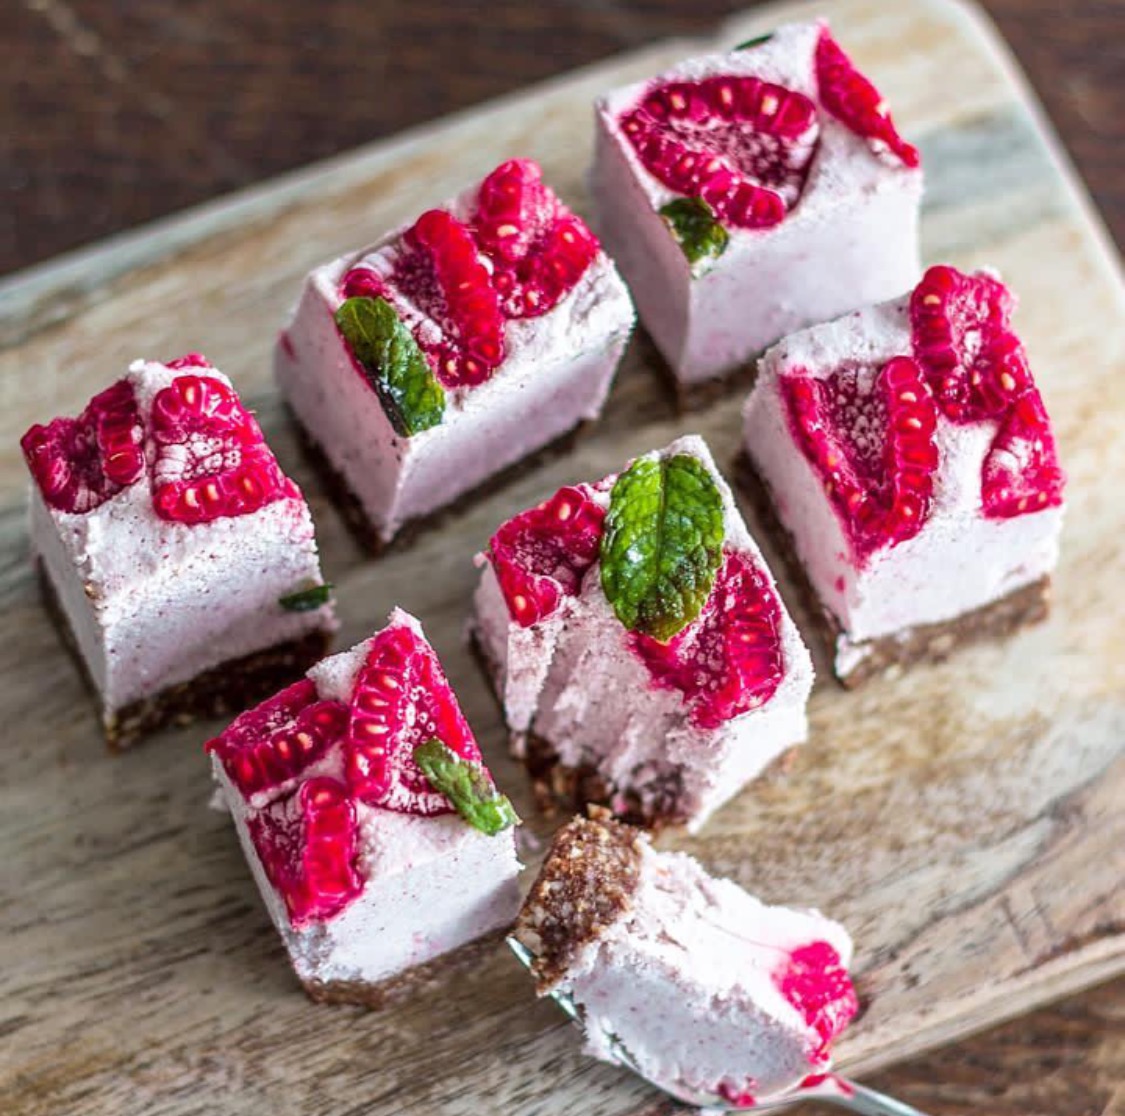
Vegan berry dessert inspiration
Refreshing Cucumber Rolls
So easy! This dish would be great for an appetizer or a light, healthy lunch, don’t you think? Have you ever made cucumber roll-ups like these ones before? Serves 4 Prep Time: 10 minutes Total Time: 15 minutes Ingredients –2 to 3 cucumbers –1 cup hummus –½ cup crumbled feta cheese –½ cup red bell pepper, finely diced –20 pitted Kalamata olives, roughly chopped –2 tablespoons oregano, roughly chopped –¼ teaspoon ground black pepper Directions 1. Using a mandolin or a vegetable peeler, thinly slice the cucumber lengthways into slices about 1/16 inch (2 millimeters) thick. Place the slices on a paper towel while the filling is prepared. 2. In a medium bowl, combine the hummus, feta, red pepper, olives, oregano and black pepper. Mix until just combined. 3. Place 1 tablespoon of the filling on one end of each cucumber slice and roll away from you. Use a toothpick to secure each roll. Chill until ready to serve.
Cheese hash brown waffles
This is how you do breakfast - egg and cheese hash brown waffles served with bacon and eggs.... Ingredients * 3 eggs * 1 (20 ounce) package frozen shredded hash browns, thawed * 1 cup shredded sharp cheddar cheese * ¼ cup milk * ¼ cup fresh chopped chives, plus some for garnishing * Kosher salt, to taste * Ground black pepper, to taste Directions 1. Preheat the oven to 200°F/95°C and heat your waffle iron on the medium setting. Spray each side of the waffle iron generously with non-stick cooking spray, or brush with melted butter or oil. 2. In a large mixing bowl, beat the eggs until they’re well combined. Add the thawed hash browns, cheese, milk, chives, salt, and pepper, and mix well. 3. Scoop about 1 cup of the the batter (depending on the size of your waffle iron) onto your heated waffle iron. Spread it into an even layer, leaving about a ½-inch border around the edge. Close the waffle iron and carefully press down the lid to compress the potato mixture (use a kitchen towel or oven mitt if needed). 4. Cook the waffle until the hash browns are golden brown, about 5 minutes (depending on your waffle maker). Check the waffle every few minutes to see if you need to adjust the browning setting during cooking. 5. When the waffle is cooked to your liking, carefully remove it from the waffle iron. Place the finished waffles on a baking sheet in the oven to keep them warm while the rest are cooking
Pomegranate Juice
If you've ever wondered how to cut a pomegranate - here you go! Along with a simple way to juice them too. Have you tried it? How to Cut & Juice a Pomegranate Ingredients * Pomegranate Equipment * Knife * Large bowl * Large spoon * Re-sealable plastic bag * Rolling pin * Strainer Directions 1. Using a sharp knife, score the pomegranate all the way around the midsection. Use your fingers to crack open the two halves. 2. Fill a large bowl with water. Holding one of the pomegranate halves over the bowl, gently stretch the pomegranate to loosen the seeds 3. Turn over the pomegranate half so that you’re holding it cut side down in the palm of your hand over the bowl. Using a spoon, whack the back of the pomegranate so that the seeds fall through your fingers into the bowl of water. Repeat with the other pomegranate half. 4. Use your fingers to scoop any large pieces of pith off of the surface of the water, then strain the pomegranate seeds. 5. Place the pomegranate seeds in a re-sealable plastic bag and seal the top. Place the bag on the countertop and roll the rolling pin back and forth across the pomegranate seeds to release their juice. (You can also use a drinking glass instead of a rolling pin, or press the pomegranate seeds with your fingers or the back of a large spoon.) 6. Place a strainer over a juice glass. Open the top of the plastic bag and pour the juiced pomegranate seeds into the strainer. (Alternatively, you could cut a small hole into the corner of the plastic bag and strain the pomegranate seeds into the juice glass through the hole — just make sure you cut the hole small enough that the seeds can’t pass through it.) 7. Discard the seeds and enjoy your glass of pomegranate juice!
Stunning Lemon butter Chicken
Dinnertime and we are craving this lemon butter chicken dish. This effortless chicken dinner has it all: crispy skin and juicy meat simmered in a luscious paprika-infused lemon butter cream sauce that you’ll want to pour all over everything — plus plenty of greens, which mean you don’t have to make a separate side dish. So good! Ingredients * 4 chicken thighs or breasts (bone-in or boneless) * 2 teaspoons smoked paprika * Kosher salt, to taste * Ground black pepper, to taste * 1 Tablespoon unsalted butter * 2 – 3 cloves garlic, minced * ½ cup chicken broth * ½ cup heavy cream * ¼ cup grated Parmesan cheese * 2 cups baby spinach, chopped * Juice of 1 lemon (add the zest if you want extra lemon flavor) * 1 Tablespoon chopped fresh thyme or 1 teaspoon dried thyme Directions 1. Preheat the oven to 400°F/200°C. 2. Season the chicken thighs or breasts with paprika, salt, and pepper and toss to coat. 3. Melt 1 tablespoon of butter in a large oven-safe skillet over medium-high heat. Add the chicken, skin-side down, and sear it for 2 to 3 minutes per side, or until it’s golden brown. Remove the chicken and set it aside. Reserve 1 tablespoon of fat in the pan and drain the excess. 4. Add the minced garlic and cook, stirring constantly, until fragrant, about 1 minute. Stir in the chicken broth, heavy cream, and Parmesan cheese. 5. Bring the mixture to a simmer and add the baby spinach. Cook until the spinach is wilted and the sauce has thickened slightly, about 3 to 5 minutes. 6. Stir in the lemon juice, thyme, and lemon zest (if using). Return the chicken to the skillet, and transfer it to the oven. Bake for 15 to 25 minutes, or until the internal temperature of the chicken reaches 165°F/73°C. Serve warm.
Celebrate your achievements with a slice of mint chocolate chip icecream pie
So easy to make and sooo good! Makes 8 – 10 servings Prep Time: 10 minutes Total Time: 2 hour 15 minutes Ingredients * ¾ cup chocolate chips, melted * 3 cups crisped rice cereal (such as Rice Krispies) * 2 pints mint chip ice cream, slightly softened * chocolate sauce or hot fudge sauce (optional decoration) * crushed chocolate sandwich cookies (such as Oreos — optional decoration) Direction 1. In a large bowl, stir the melted chocolate chips with the crisped rice cereal until the cereal is completely coated in chocolate. Use a rubber spatula to press the mixture into an even layer on the bottom of a 9-inch round springform pan, and up the sides of the pan about an inch to create a crust. 1. Freeze until firm, about 5 to 10 minutes. 2. Spread the softened mint chip ice cream into the prepared crust. Cover and freeze it for at least 2 hours, or until firm. 3. Remove the pie from the pan and cut it into slices. If desired, serve it with chocolate sauce or hot fudge drizzled on top and decorate it with crushed chocolate sandwich cookies.
More from this author
View all posts


One thought on “Month2 Day 22: Rest”
Leave a Reply Cancel reply
You must be logged in to post a comment.
YUM!!!!