Enjoy over 155 healthy beautiful vegan recipes with deliciously vegan by Annett Velsberg. Anett has collaborated with Martha Stewart Living, taste, glamour magazine and more. Deliciously vegan gives you easy to follow recipes complemented by beautiful photography. Over 150+ recipes with exclusive content that cannot be found elsewhere. New recipes are added constantly.
Easily add recipes to your favorite list and add ingredients from recipes to your custom shopping list which you can easily manage with the touch of your finger. Use filters to customize the app to fit your lifestyle- gluten free, fat free, low fat, sugar free and more. Browse tons of categories, mains, desserts, breakfast , soups, drinks and more.
Features
Exclusive recipes with helpful tips to make you a smarter cook
Search for recipes by ingredient or recipe title
Easily favorite your face recipes and keep them in your favorite tabs for easy access
Filter recipes to fit your lifestyle: gluten free, nut free, low fat, quick and more
Browse tons of categories that are constantly updating: mains, desserts, bowls , breakfast, soups, drinks and more. Get free recipes to start and then you can buy individual categories or buy all and get a special discount. Get access to all new future recipes for free.
Beautiful design and high resolution photography makes everything easy to navigate.
Click here for our top recommended fitness and health supplements
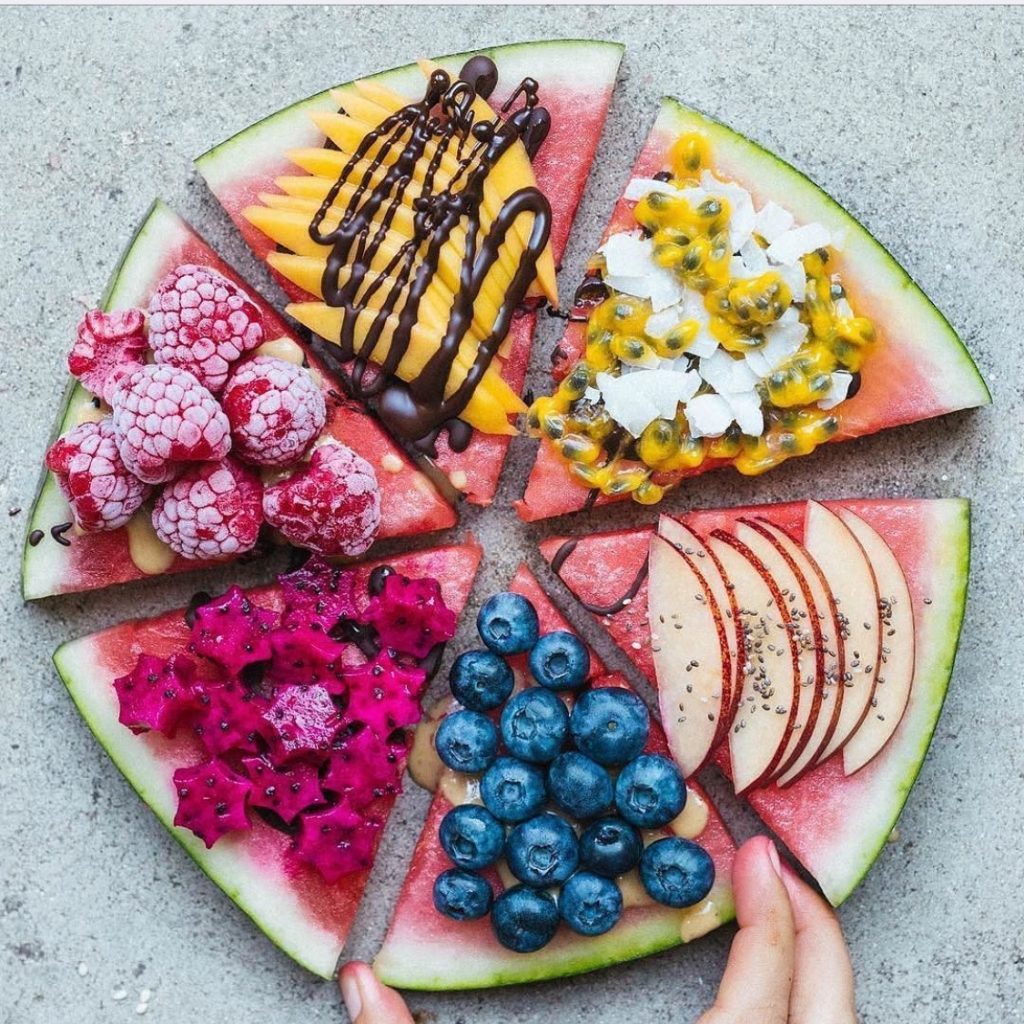
Watermelon Pizza
Ingredients
* 1/2 c. ricotta
* 1/4 c. softened cream cheese
* 1 tbsp. honey
* 1/2 tsp. vanilla
* Watermelon slice, 1" thick
* Fresh berries, for garnish
* Fresh mint, for garnish
* Toasted coconut, for garnish
Directions
1. In a small bowl, mix ricotta, cream cheese, honey, and vanilla together until combined.
2. Spread mixture onto slice of watermelon and top with berries, mint, and toasted coconut. Serve immediately.
Source: By @anettvelsberg
Vegan sushi rice cups.
Tag a sushi lover
Source: By @anettvelsberg
2-ingredient vegan & glutenfree chocolate mousse!
Unbelievably airy and delicious.
Source: By @anettvelsberg
The BEST fluffy nice cream
Sub raspberries with any other berries or fruit you have. And no fancy blender needed, just a regular food processor!
Source: By @anettvelsberg
Almond berry cake
Gluten free & vegan! Such a simple & delicious cake, perfect with a dollop of coconut whip & a cup of thea.
Source: By @anettvelsberg
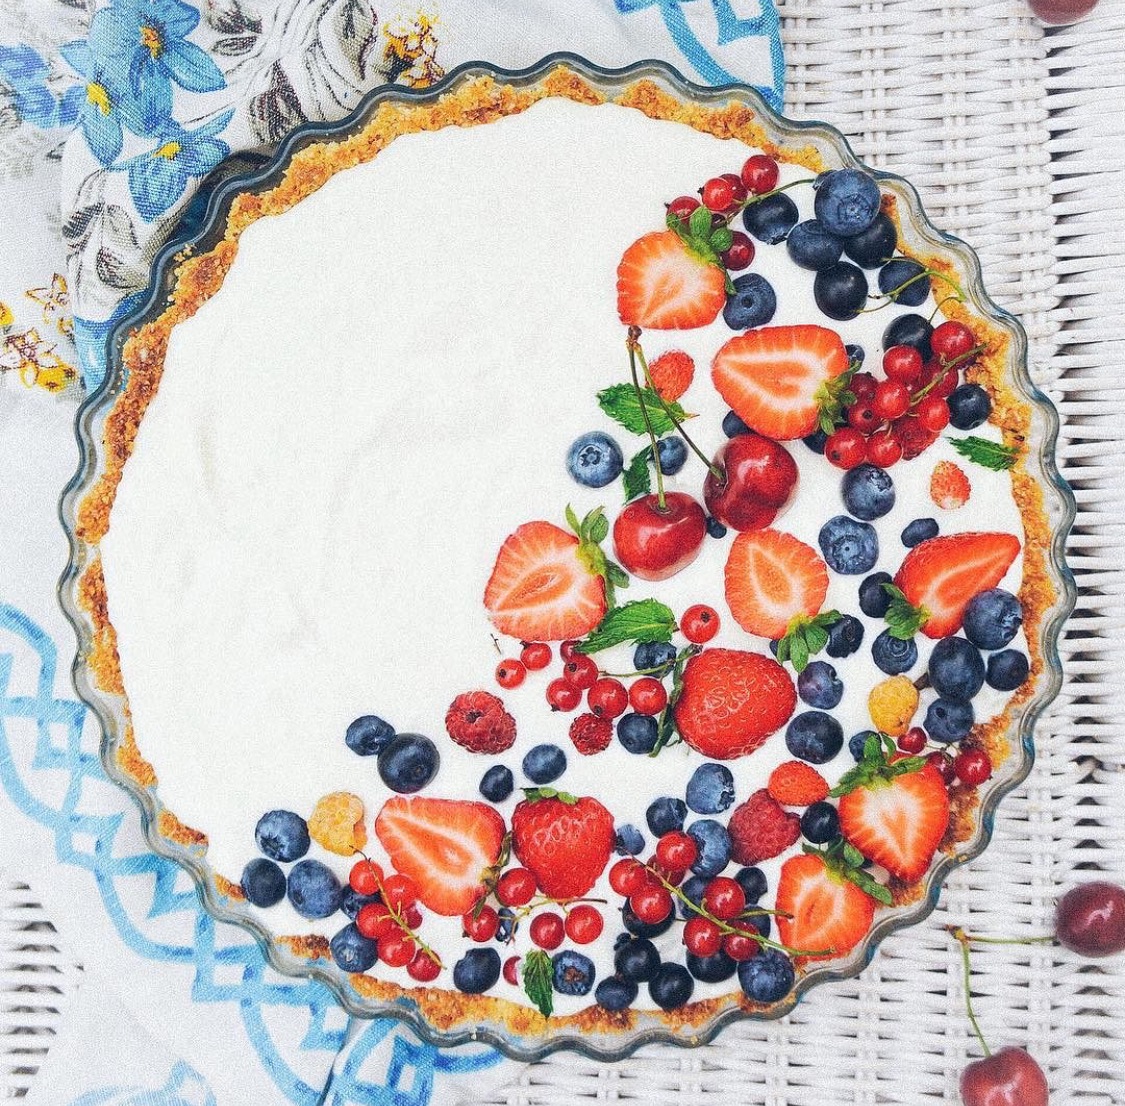
Coconut berry tart
For the crust:
2 1/2 cups (290g) all-purpose flour
1/2 tsp salt
1 tbsp caster sugar
1/4 cup (50gr) solid coconut oil
3-4 tbsp ice water
For the filling:
1 1/2 cups good quality coconut cream, cold
3 tbsp maple syrup
1 tsp vanilla powder
zest from 1/4 lemon
To garnish:
1 1/2 cups fresh berries
Directions:
Preheat oven to 350F (180C).
Place the flour, salt and sugar in a food processor and blend to combine. Add the coconut in pieces and pulse until the mixture resembles breadcrumbs. With the processor running, slowly add the water until the dough comes together. Wrap it in plastic wrap and place in the fridge for 15 minutes.
Roll the dough out on a floured surface and use it to line a 24-cm tart tin, pushing the pastry up on the sides. Using a fork, make holes in the pastry, then place the tart in the oven for 15-20 minutes, until slightly browned. Let cool.
To make the filling, whisk the coconut cream, maple syrup, vanilla and lemon zest with an electric beater until light and fluffy. Fill the tart case, then top with berries. Keeps best in the fridge.
Source: By @anettvelsberg
Pink & white chocolate dipped cones filled with berries, chocolate & choc chip cookies
1, 2, 3, 4, 5 or 6?
Source: By @anettvelsberg
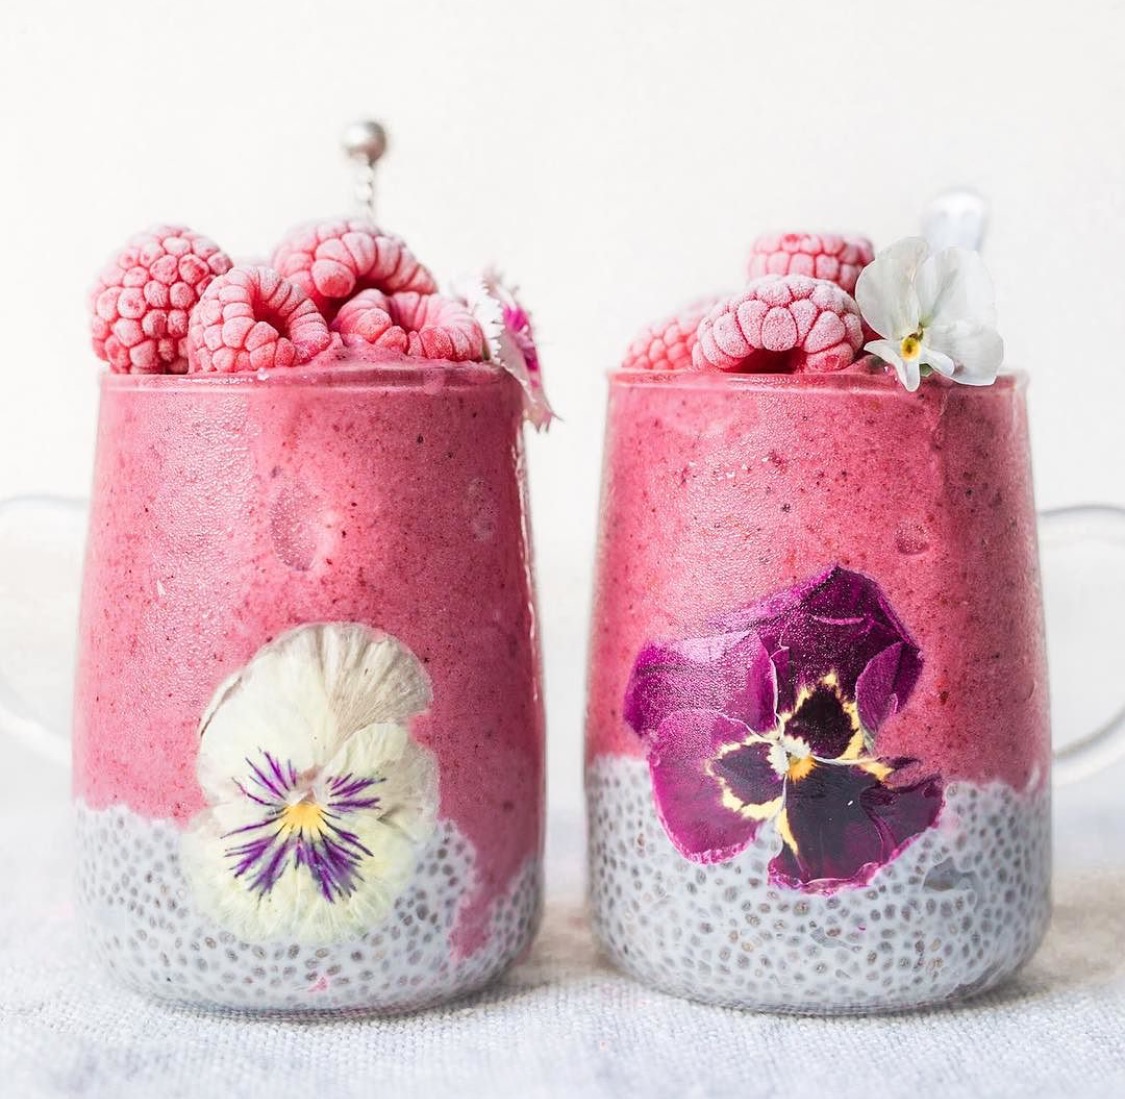
Berrylicious chia pudd parfaits
Which one would you eat first?
INGREDIENTS:
Chia pudding
* 2 tbsp of chia seeds,
* 80g natural soy yogurt,
* 100ml plant based milk (I took soy),
* 1/4 tsp vanilla
Berry mousse
* 250g natural soy yogurt
* two handful of mixed berries
* 1 scoop of natural vegan vanilla protein powder (optional, you can also leave it out but then the consistency will be more liquid)
INSTRUCTIONS:
1. For the chia pudding, Just stir everything around and place it in the fridge. After approx. one hour you should stir it around once again to make sure the chia seeds are not stuck to the bottom!
2. For the berry mousse, mix everything and place it in the fridge overnight.
3. The next morning, slice up one kiwi. Put the chia pudding in a jar and place the kiwi slices against the rim of the jar. Put the berrymousse on top and top it with whatever you like.add edible flowers and chuck it down the jar.
Source: By @anettvelsberg
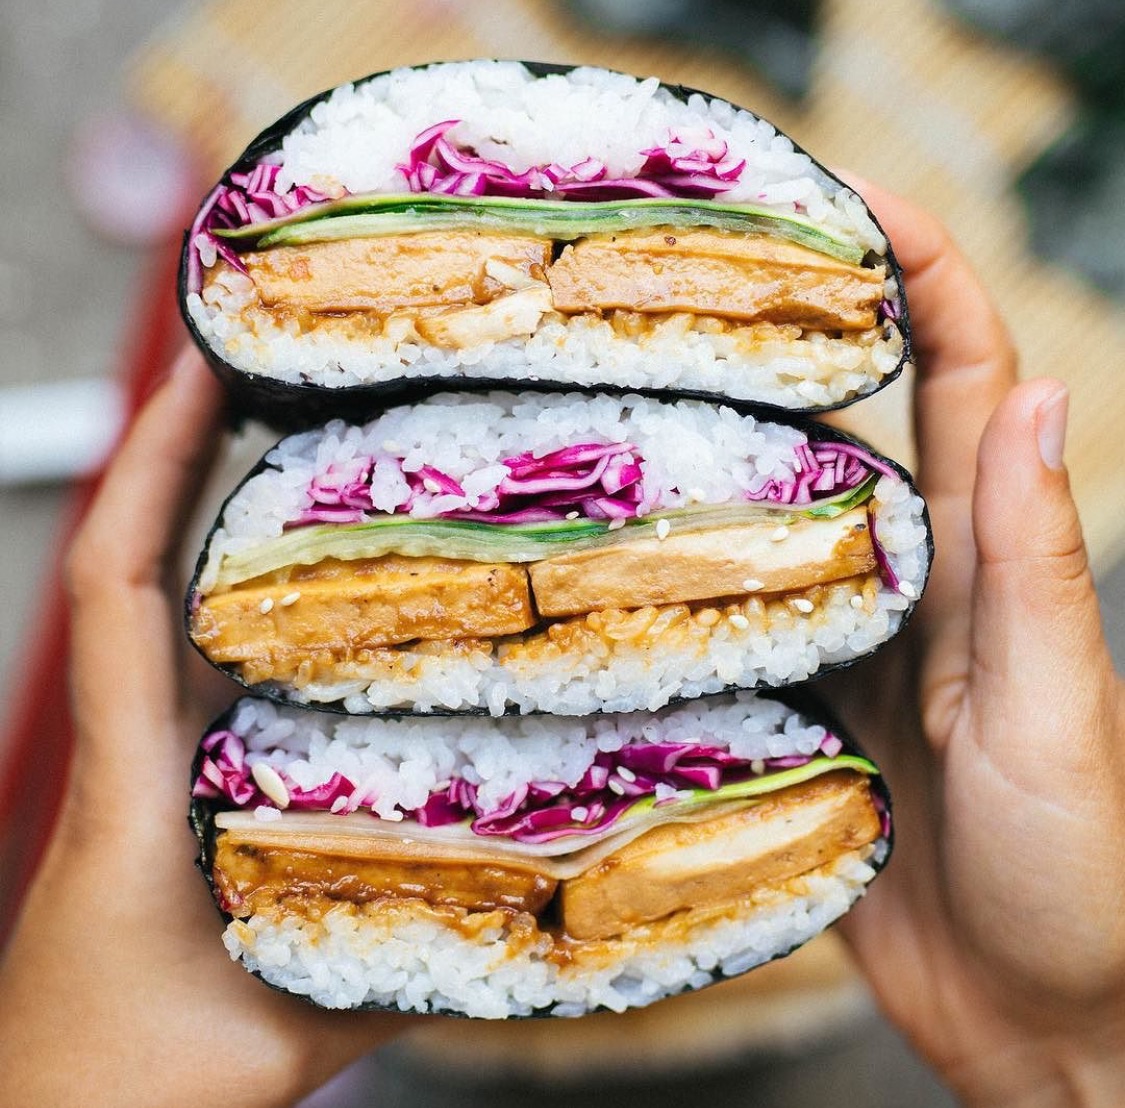
Sticky tofu onigirazu aka sushi sandwich
Filled with crunchy quick-pickled red cabbage & cucumber.
INGREDIENTS
ONIGIRAZU
* 4 nori sheets
* about 4 cups of cooked sushi rice*
* 1 avocado, sliced
* 25 g / 1 oz baby spinach
* red cabbage, shredded and pickled (optional, see below)
* Sriracha or vegan mayo
TOFU KATSU VERSION
* 2 x 200 g / 7 oz firm tofu, pressed**
* tamari or soy sauce
* 1 cup aquafaba (reduced so that it resembles an egg white)
* 1-2 cups panko breadcrumbs (GF breadcrumbs for GF version)
* all purpose flour or cornflour (for GF version)
* 2 cups frying oil (for fried version only)
SWEET POTATO VERSION
* 1 large sweet potato
* 1 tbsp tamari (GF) or soy sauce
* 1 tbsp maple syrup
* 2 tsp neutral oil
* 1 tsp toasted sesame oil
* 2 tsp rice vinegar
QUICK PICKLED RED CABBAGE (optional)
* a wedge of red cabbage, sliced thinly
* ½ cup rice vinegar
* 2 tbsp sugar or maple syrup
* 1 tsp fine sea salt
* 1 clove of garlic, crushed with the side of a knife
METHOD
1. FILLINGS TOFU KATSU VERSION
1. BAKED – Set the oven to 200° C / 390° F and line a baking tray with baking paper. Toast panko breadcrumbs in a small pan until golden (they will gain more colour in the oven). Cut each tofu block into two 50% thinner blocks. Sprinkle tofu with some soy sauce (or tamari) or you can season the flour with plenty of salt instead. Drag tofu in flour making sure that the entire surface area has been coated. Dip the tofu in the gelatinous aquafaba and finally drag it in the pre-toasted breadcrumbs. Brush a bit of oil on the baking paper underneath the tofu and bake for about 30 minutes (until crisp and dry) flipping the pieces to the other side half way through.
2. FRIED – Fill a small pot with 2 cups of frying oil and set on the stove. Cut each tofu block into two 50% thinner blocks. Sprinkle tofu with some soy sauce (or tamari) or you can season the flour with plenty of salt instead. Drag tofu in flour making sure that the entire surface area has been coated. Dip tofu in gelatinous aquafaba and finally drag it in breadcrumbs. Carefully lower the tofu, one piece at the time, into hot oil and let it fry for about 3 minutes on each side. Once ready, place fried tofu on a piece of kitchen towel to get rid of the excess oil.
3. You can also prepare tofu as in this recipe.
2. SWEET POTATO VERSION
1. BAKED – Set the oven to 220° C / 425° F and line a baking tray with baking paper. Mix all the remaining ingredients together in a small bowl. Cut the middle (widest) section of your sweet potato, peel it and slice into ½ cm / 0.2″ slices. Brush each slice with the marinade and place the slices on the prepared baking tray. Bake for about 20 min (until soft), flipping the slices to the other side halfway through.
2. You can also make sweet potato into a katsu like in this recipe.
3. ASSEMBLY
1. Cut a square of cling film slightly larger than your nori sheet. Place it on the table, place the nori sheet on top with the shiny side down and rotated 45° in relation to the cling film (SEE PHOTOS above).
2. Wet your hands (keep a small bowl of water handy to wet your hands) and grab a handful of rice. Place it in the middle of the sheet and using your hands form it into a compacted square (about 9 cm / 3.5 ” by 9 cm / 3.5 “). Try to make that layer as even and compacted as possible. Season well with salt.
3. Place remaining ingredients on top. For the tofu onigirazu, I put a layer of spinach, avocado slices, Sriracha and tofu katsu. For the sweet potato onigirazu, I used a layer of pickled cabbage, avocado slices, Sriracha and a sweet potato disc. At this point cover all the ingredients with another layer of compacted rice. I found it a bit tricky to get the rice packed tightly without squashing the ingredients underneath. My hack solution was to create that top layer of rice on a lightly oiled piece of aluminium foil, put this rice layer on the top of the stack and then peel the foil off at the end (see the video above). Otherwise you can get a special onigirazu mould that makes this easier, but I do not have one.
4. Once you are done with your stack, seal all four corners of the nori sheet on top of the filling. Fold the right corner over the stack, wet the end of the nori sheet with a wet finger and fold the left corner over the stack and ‘glue’ it to the right corner. Repeat the same thing with bottom and top corners until you get a small packet.
5. Finally gather all the cling film over the stack and tie on the top. Put something moderately heavy (like a breadboard) on the onigirazu and set it aside to let the seaweed soften a little. Cut in half with a sharp knife.
4. QUICK PICKLED RED CABBAGE (optional)
1. Place shredded cabbage in a sterilised, medium size jar.
2. Put the remaining ingredients and 120 ml / ½ cup water in a small pot. Bring to a gentle boil, over low heat.
3. Once they come to the boil (make sure the sugar has dissolved), pour the mixture over the cabbage and stir well. Make sure that the pickling liquid covers all of the cabbage. Set aside for 6-8 hours and consume.
NOTES
*I’ve only made onigirazu with sushi rice, but I have made sushi with brown rice and red Thai rice before so if you are after a healthier option, try to use either of these instead.
**To press the tofu, you either need a special tofu press or you can do it with a bunch of kitchen towels and a heavy weight. Wrap your tofu in a paper towel, place it on a plate and weigh it down with something heavy (like a can of coconut milk, for example). Once the paper towel becomes wet, change it for a new one. Repeat a few times until the paper towel stays almost dry. Pressed tofu is tastier as it absorbs flavours better.